
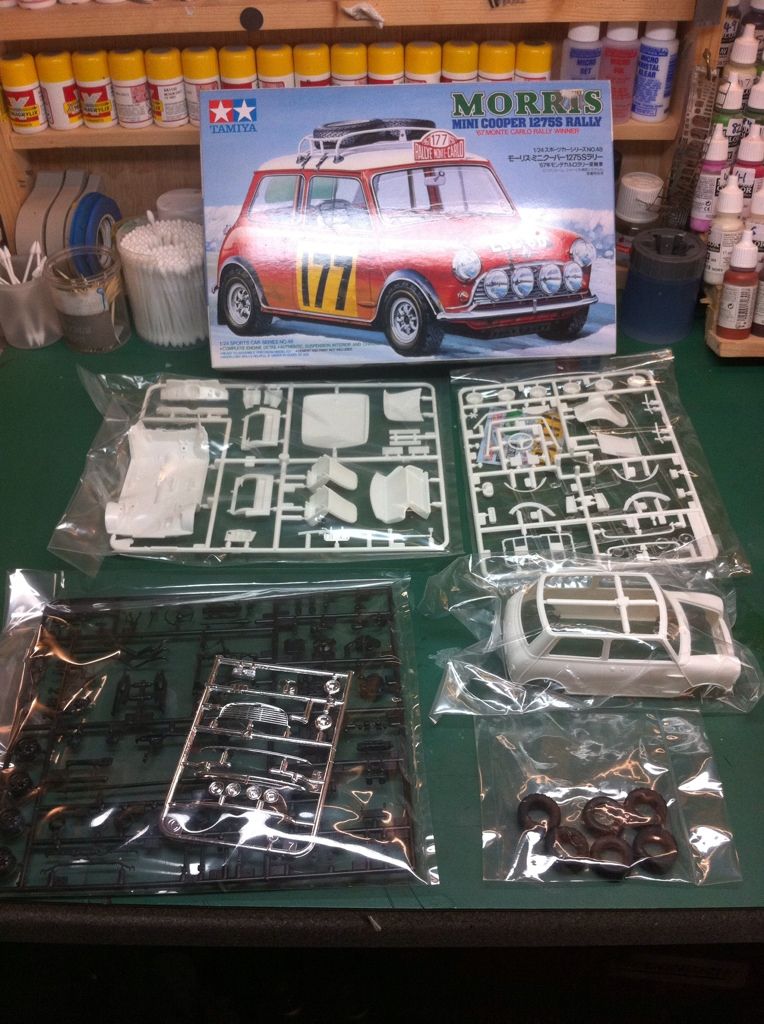
Thought it bout time I built this.
Its part of a tamiya group build over on,the promodeler forum

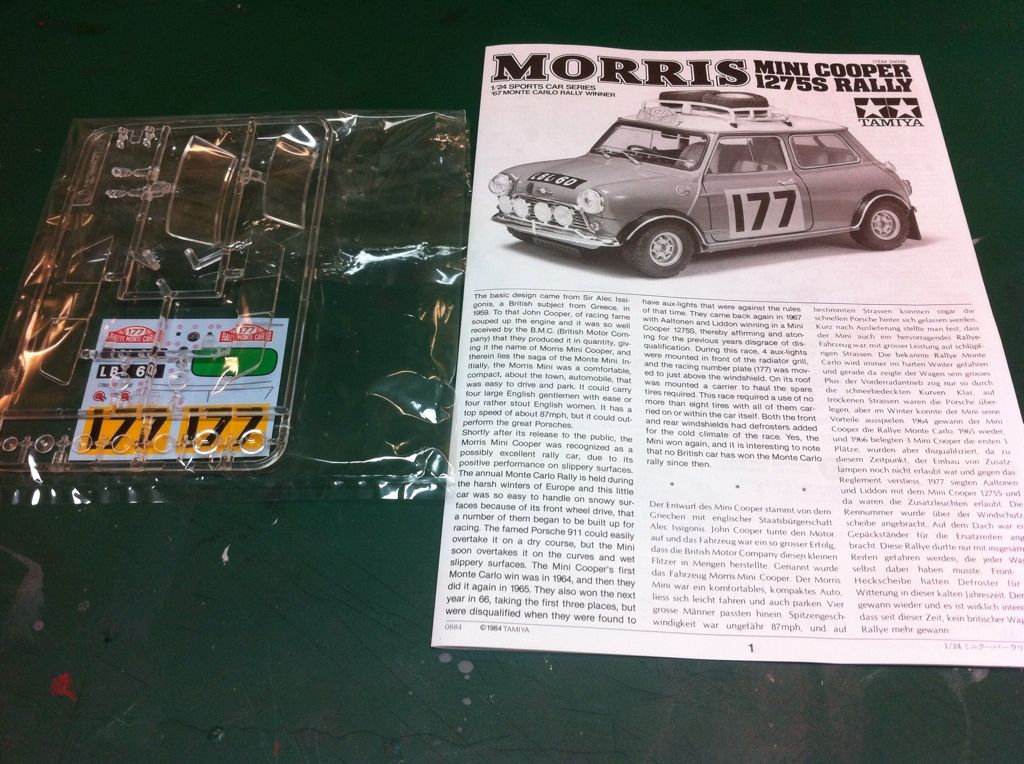
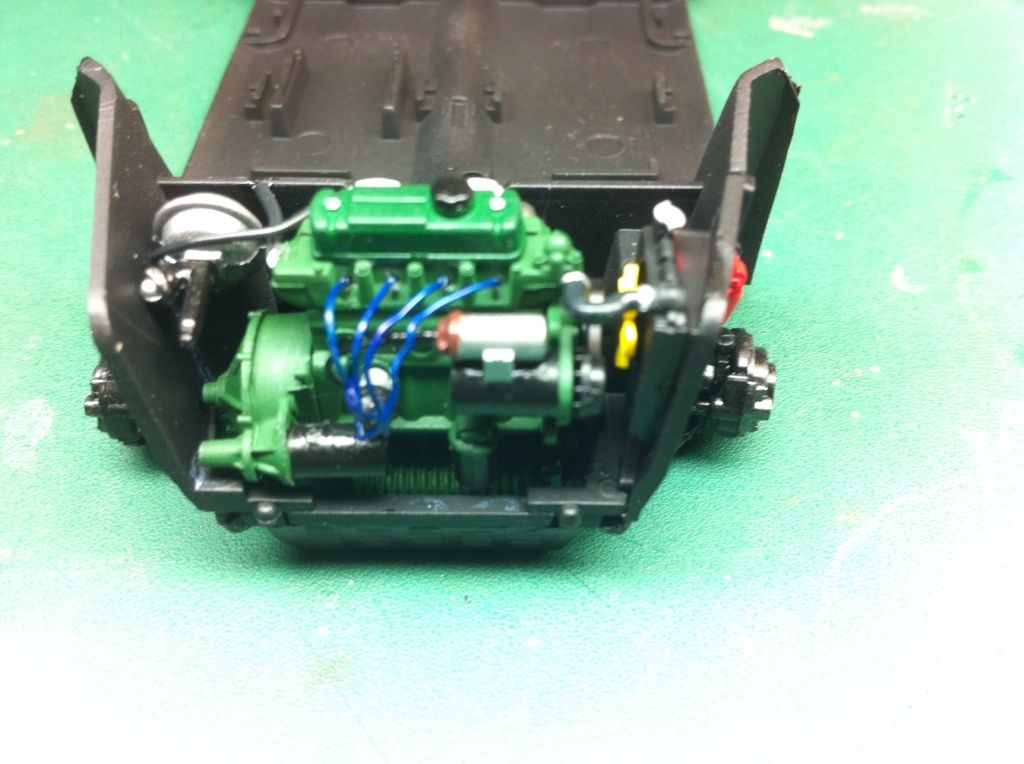
Made a start on the engine and drivetrain.
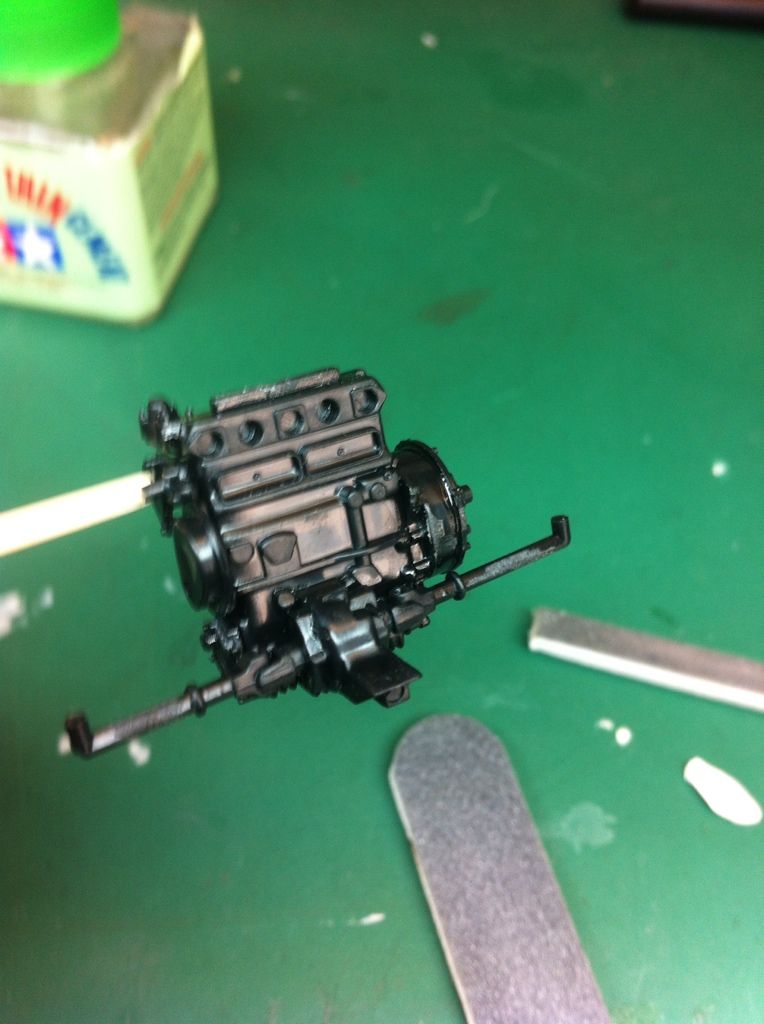
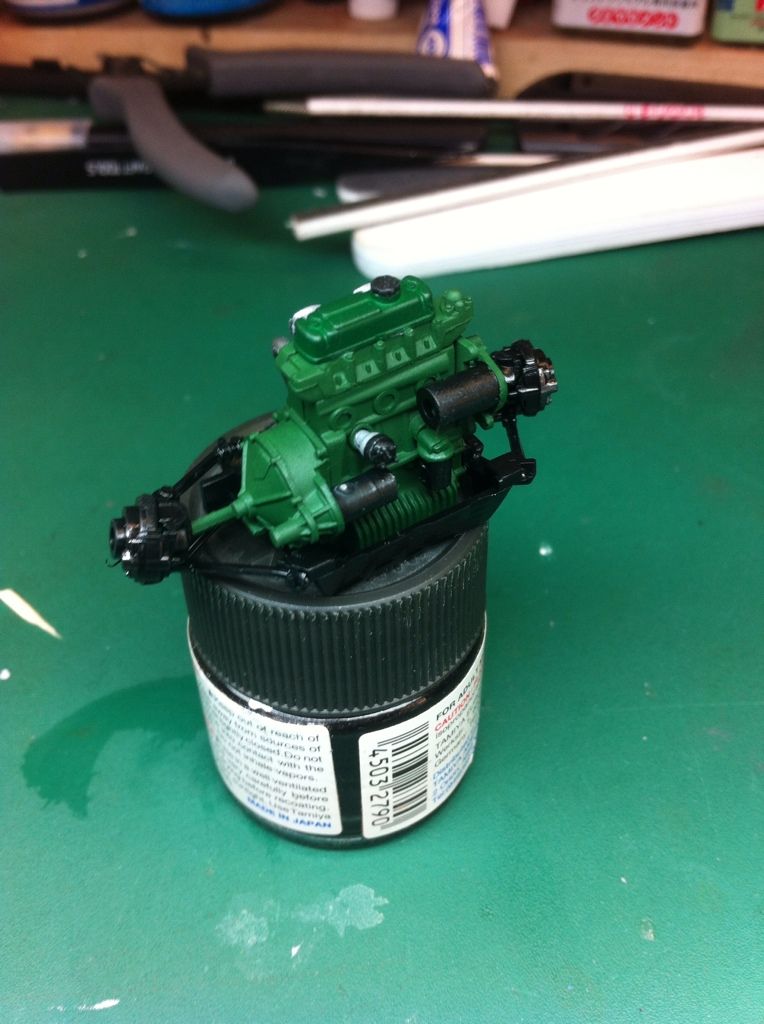
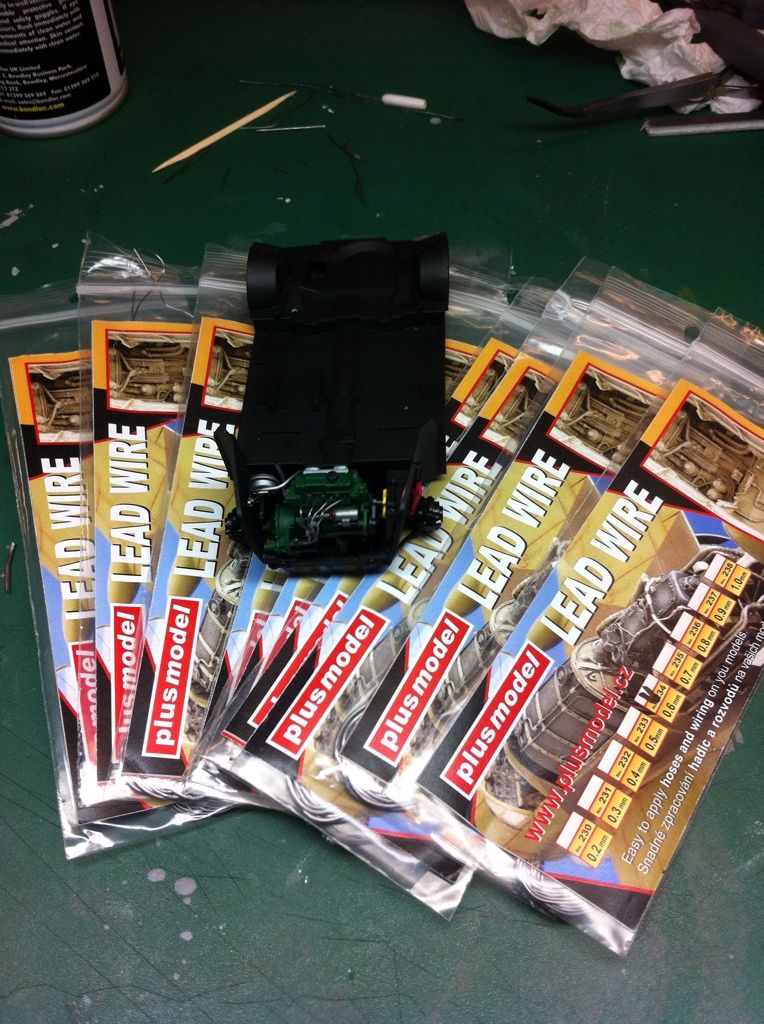
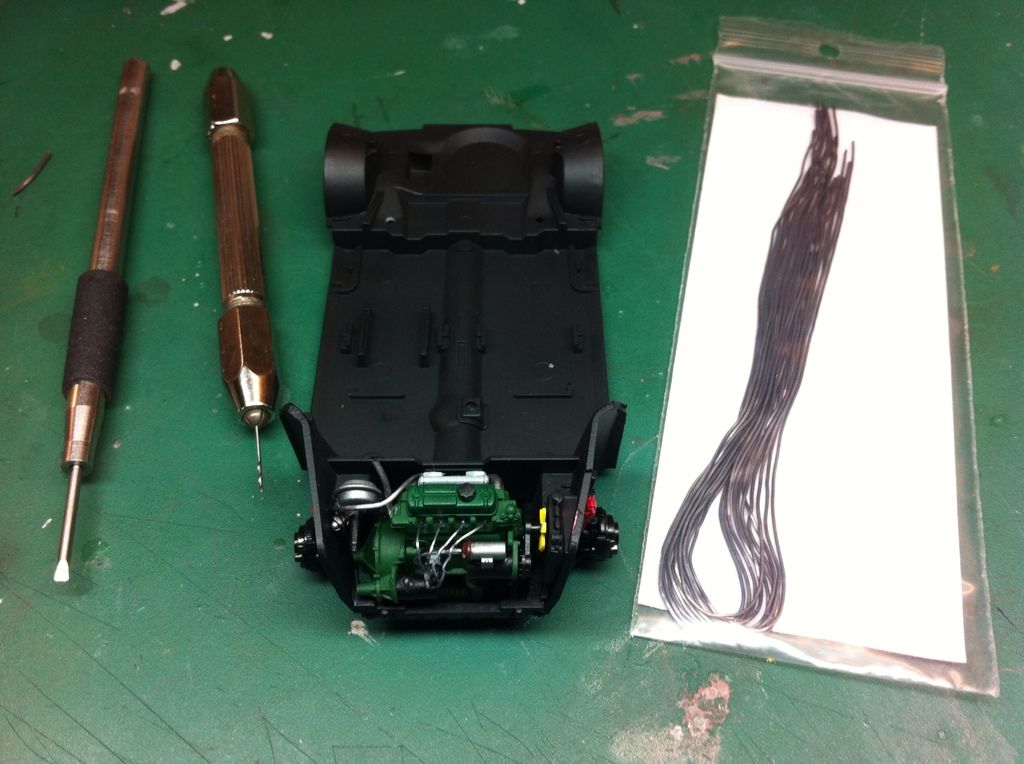
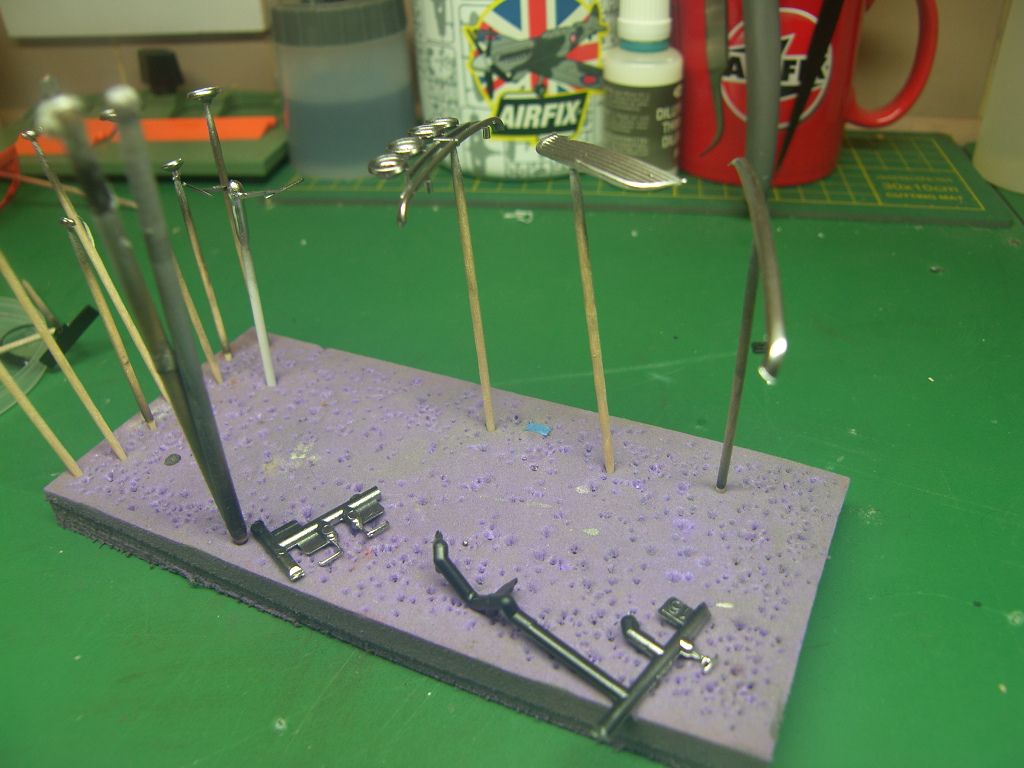
Got the chassis built as well as most of the engine, thought I would detail it a bit using some lead wire, for water hoses, and ht leads ect.
Excellent stuff the plus model wire.
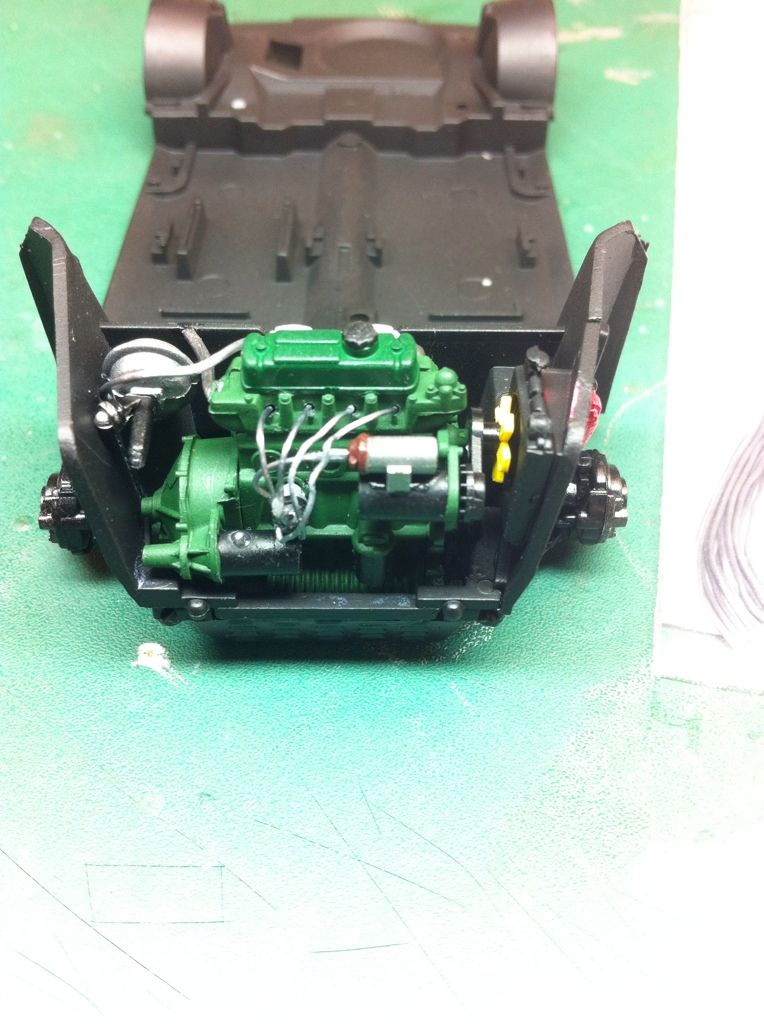
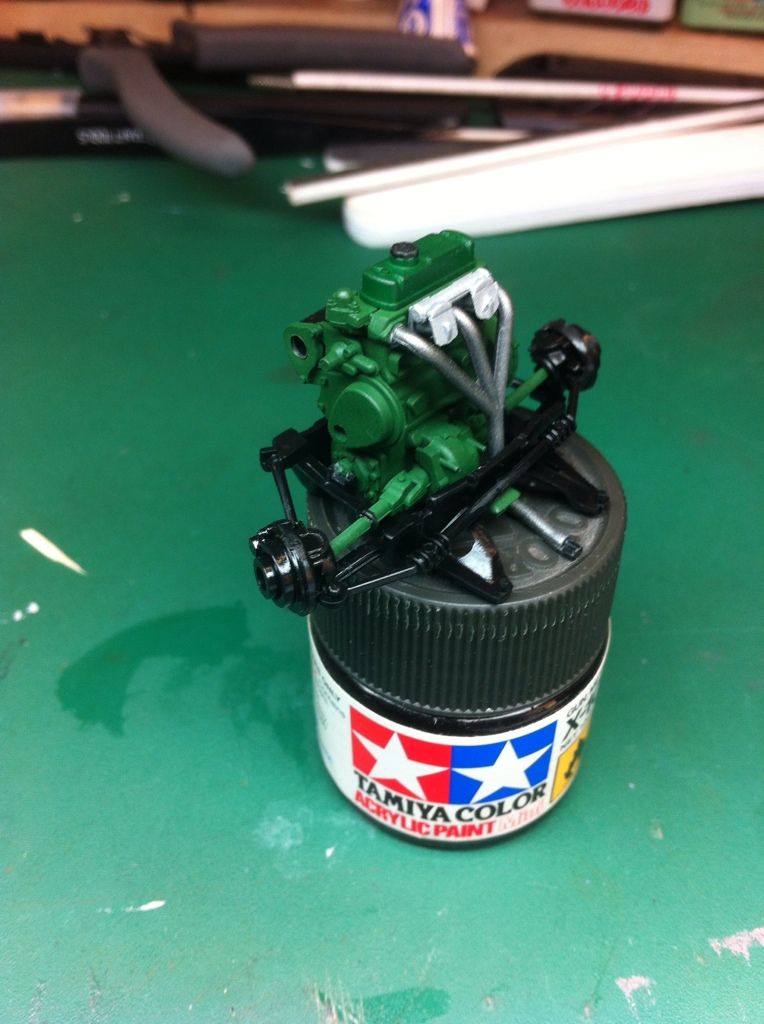
Got the hoses and leads,painted still need to add the carbs and a few other parts but need to build the dashboard first.monce complete ill weather the engine to make it look used.
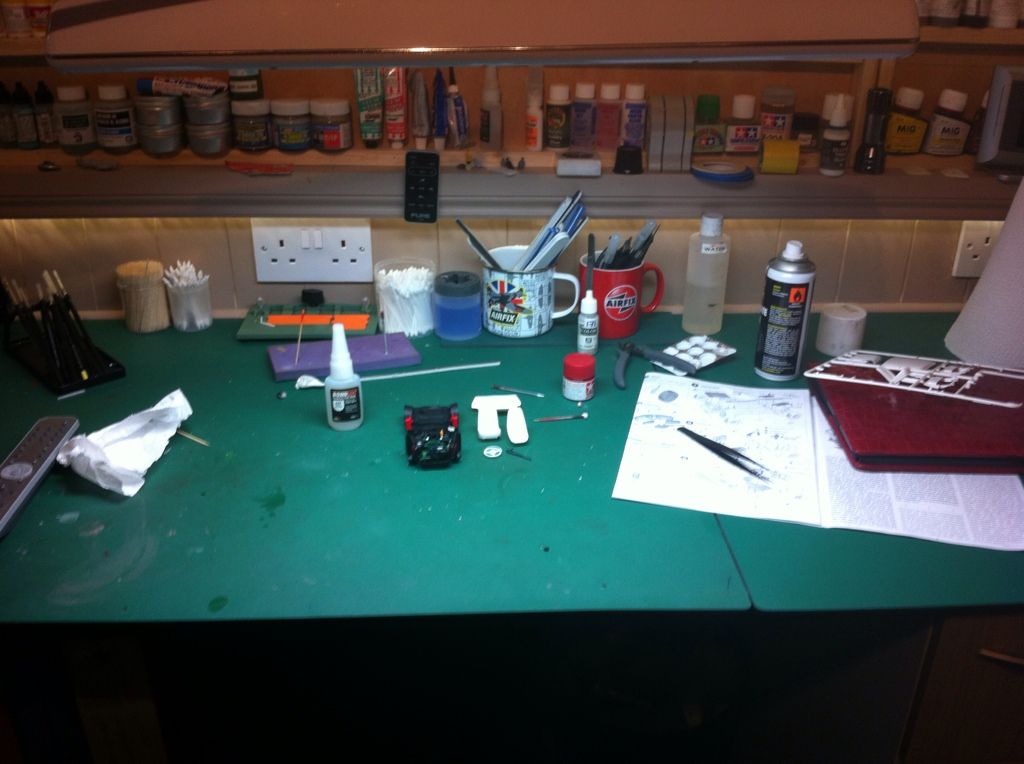
Wahey finally back at it again and in my new modelling cave. Love my new work area loads of room and nice and peaceful (well for me, god help the neighbours who were listening to my new hifi lol)
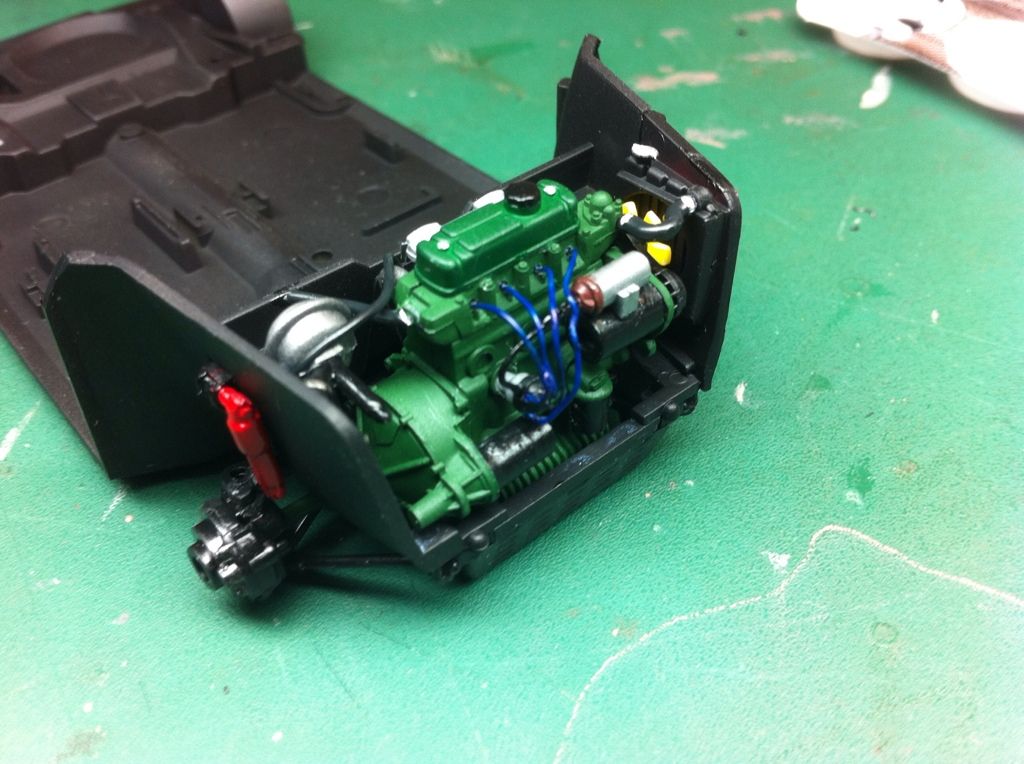
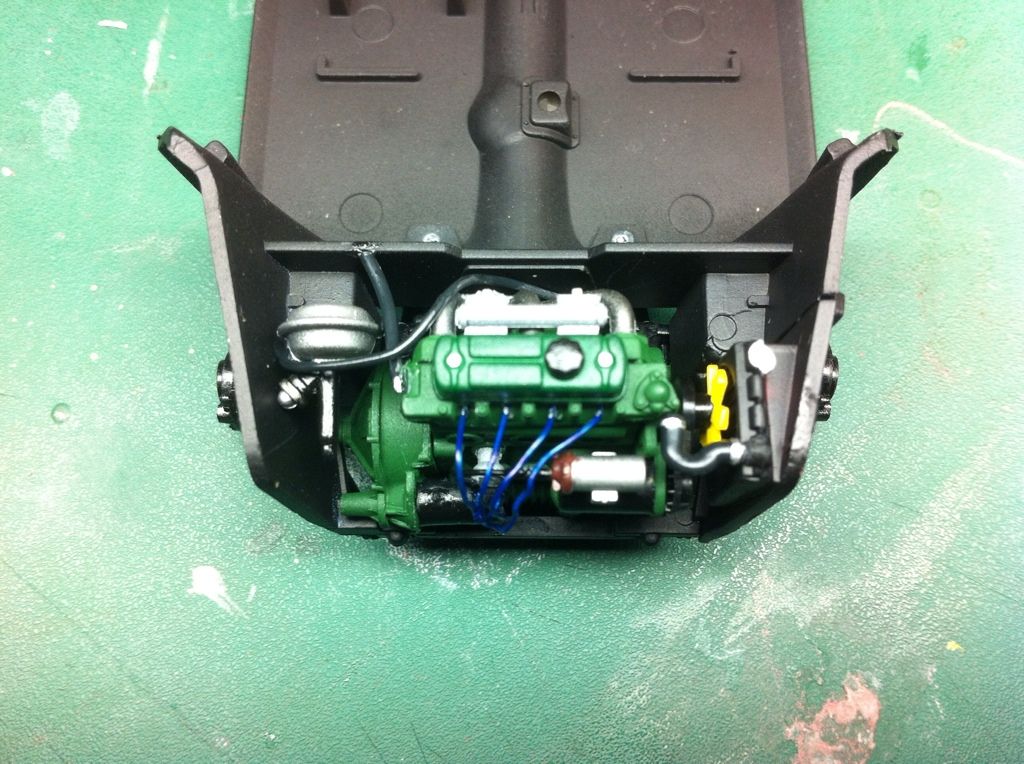
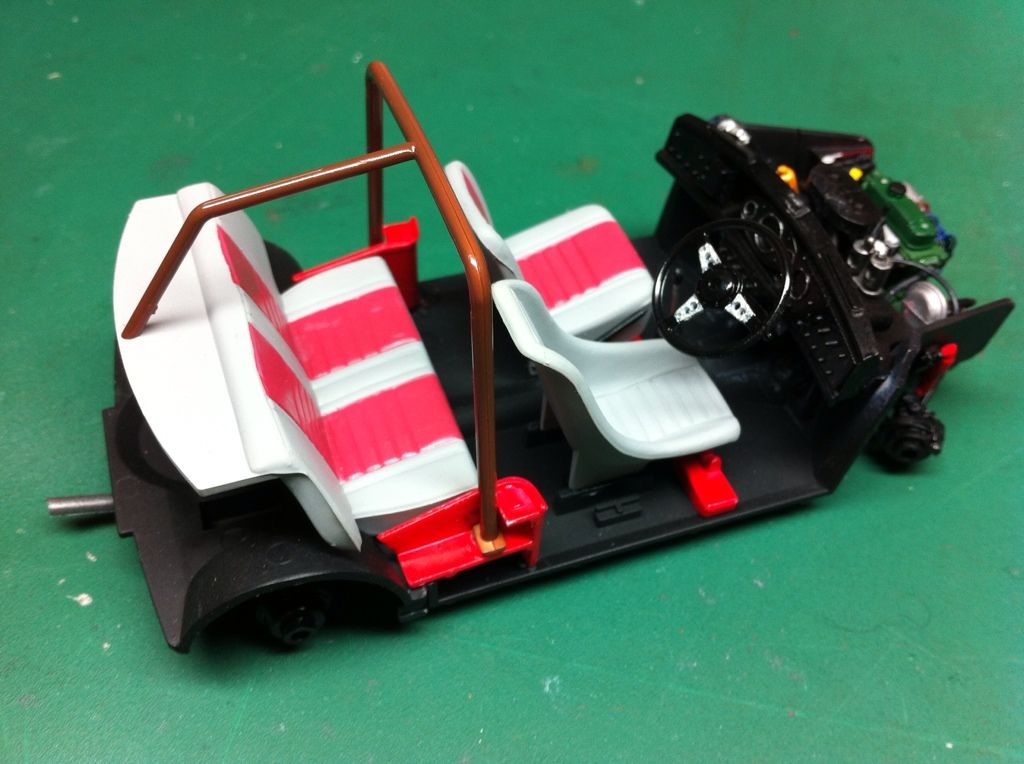
Got a little more done to this today, fitted the dashboard, and more engine parts, carbs inlet manifold etc and started on the interior. 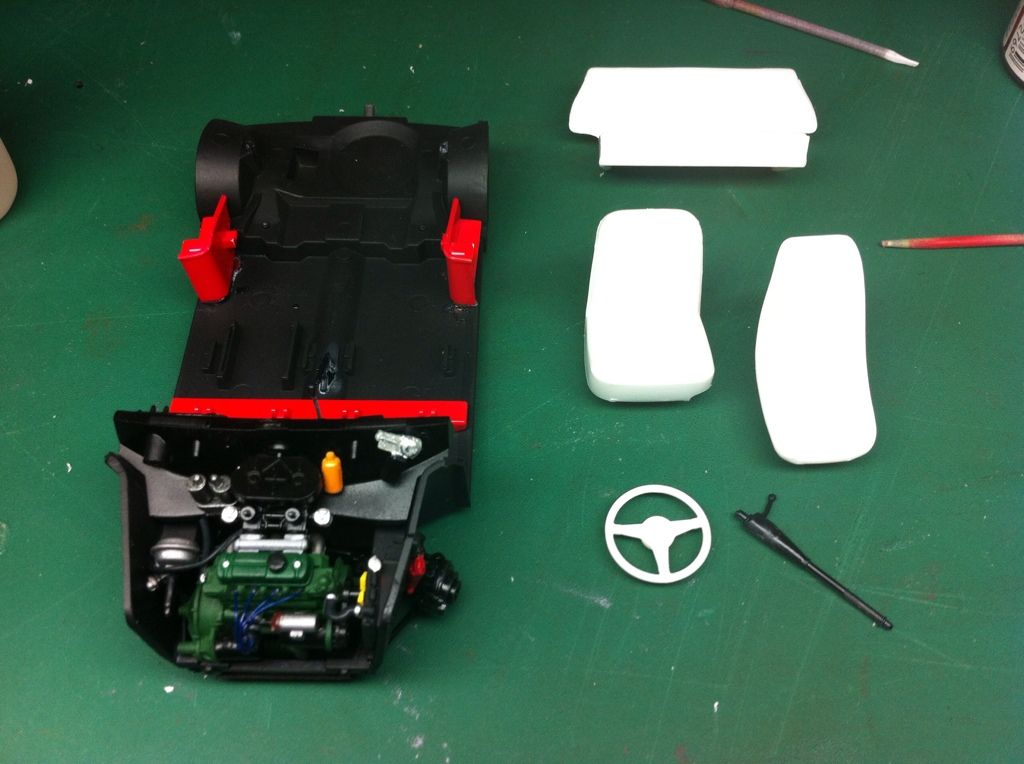
with the interior together and painted just need to weather it a little, give the engine and seats a wash etc. 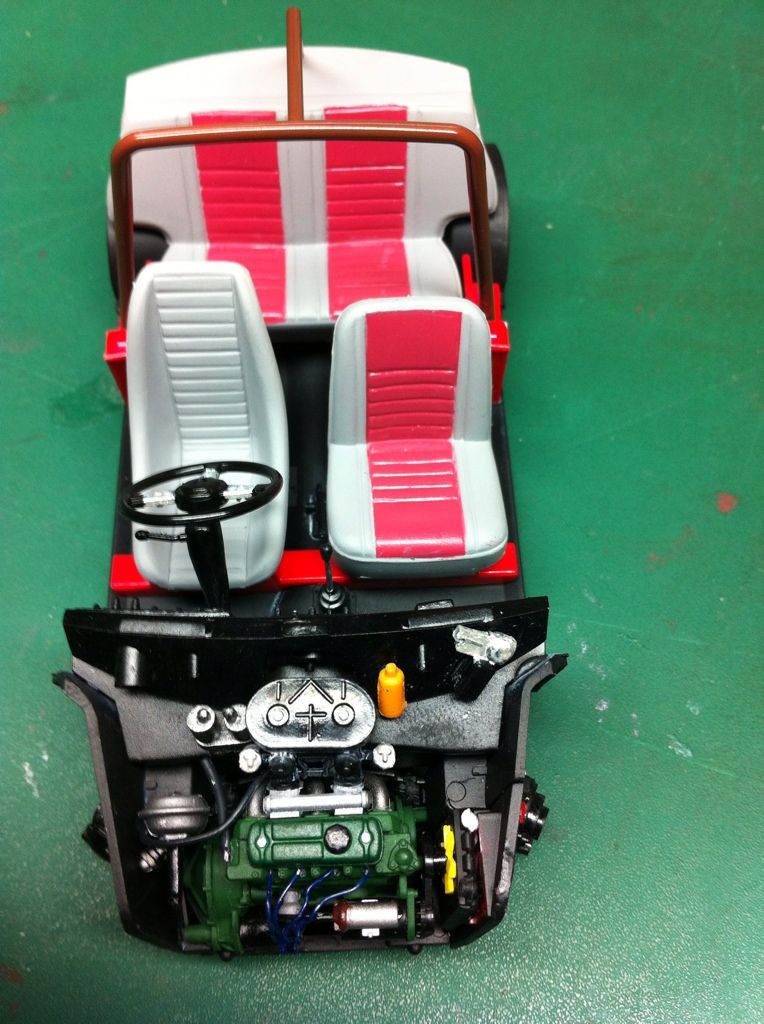
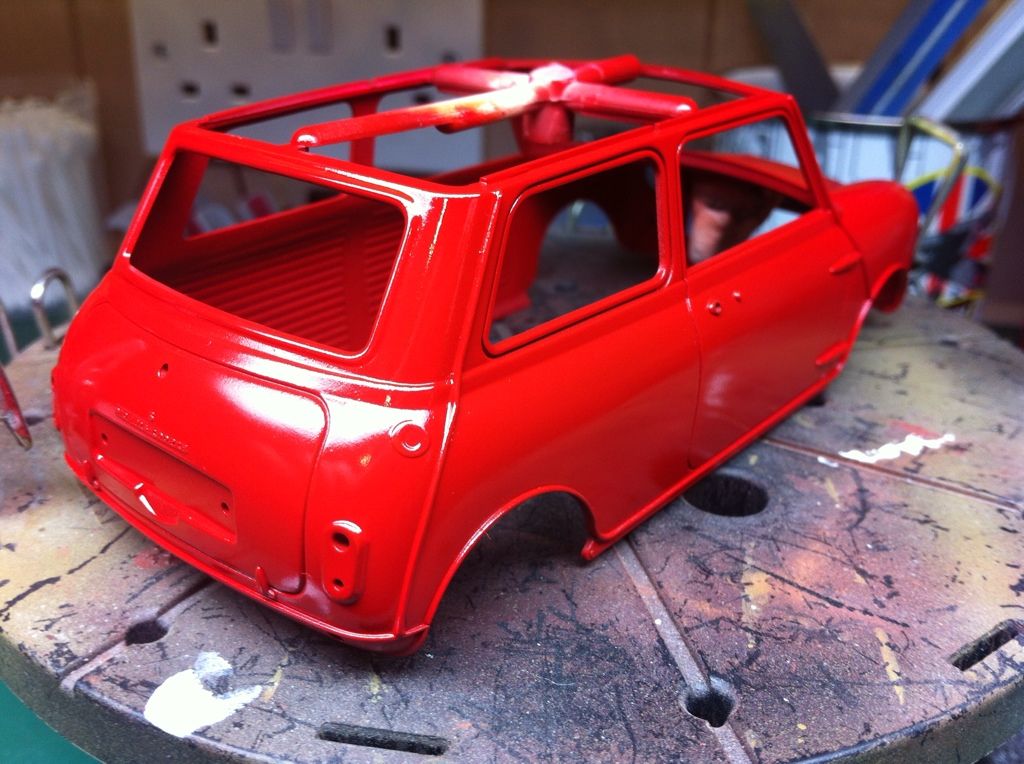
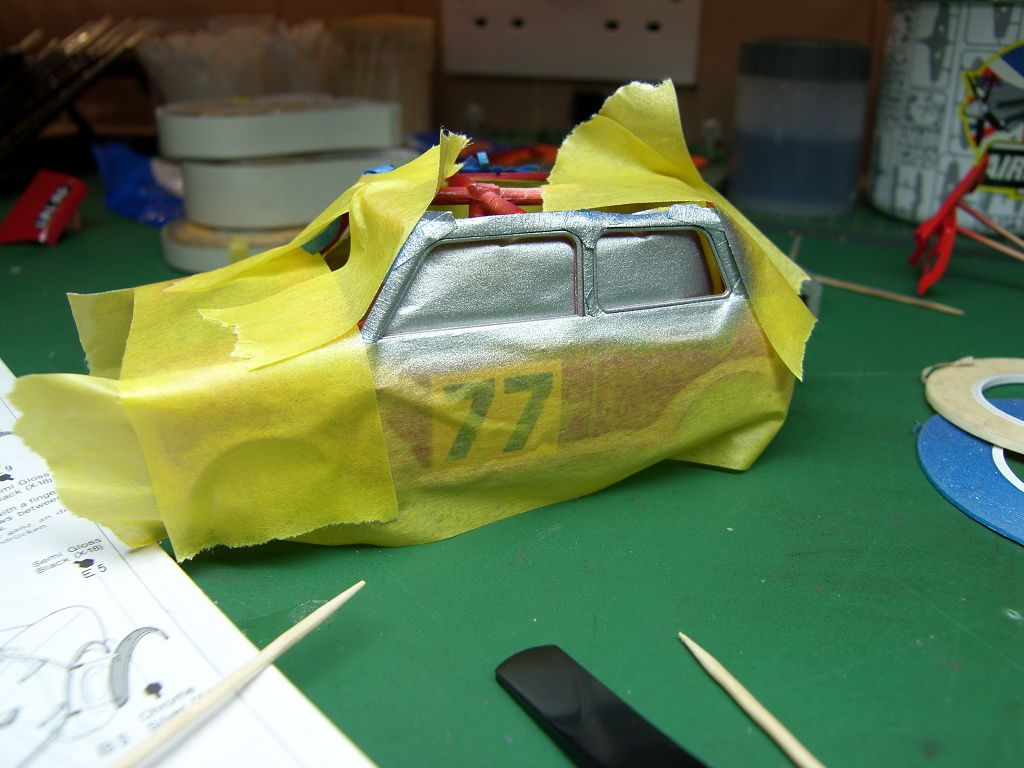
Got the body primered 
Took the finish back with an ultra fine pad.
And gave it a coat if tamiya x7 red as per the instructions but thought it too red so added a little orange and after another ultra fine pad going over a degrease and tack cloth gave it a coat of the red orange mix. 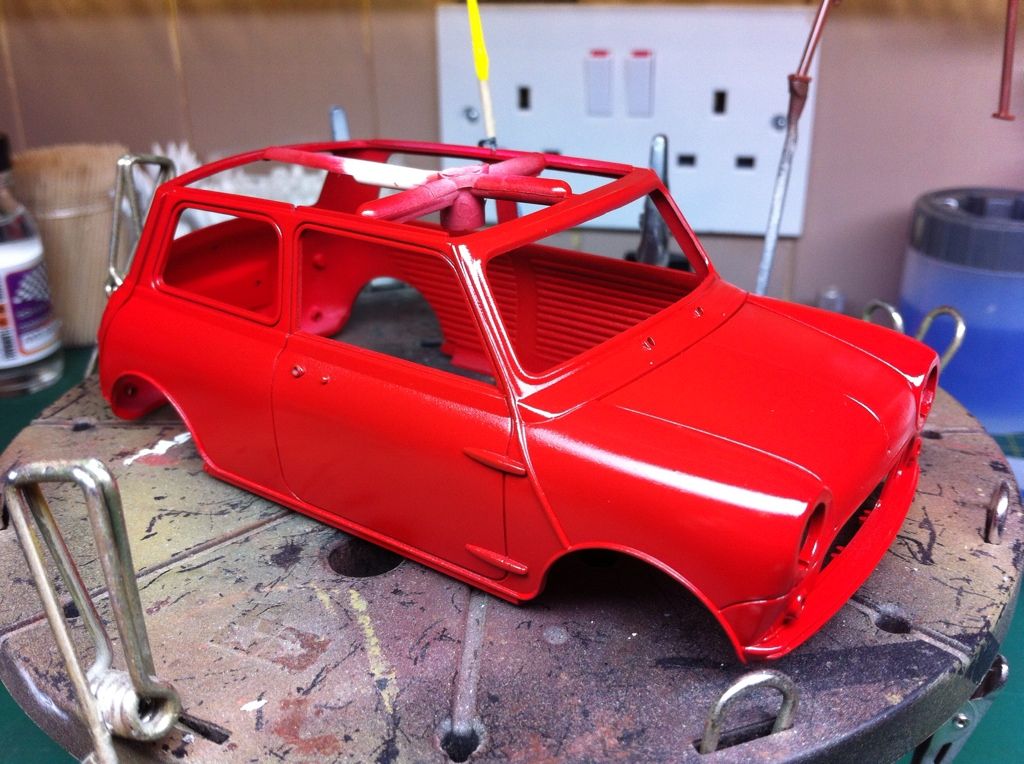
This was then allowed 24 hours to harden in the warm workshop then another going over with the pad, degrease and tack cloth it was given another coat of paint.
A bit shinier this time. 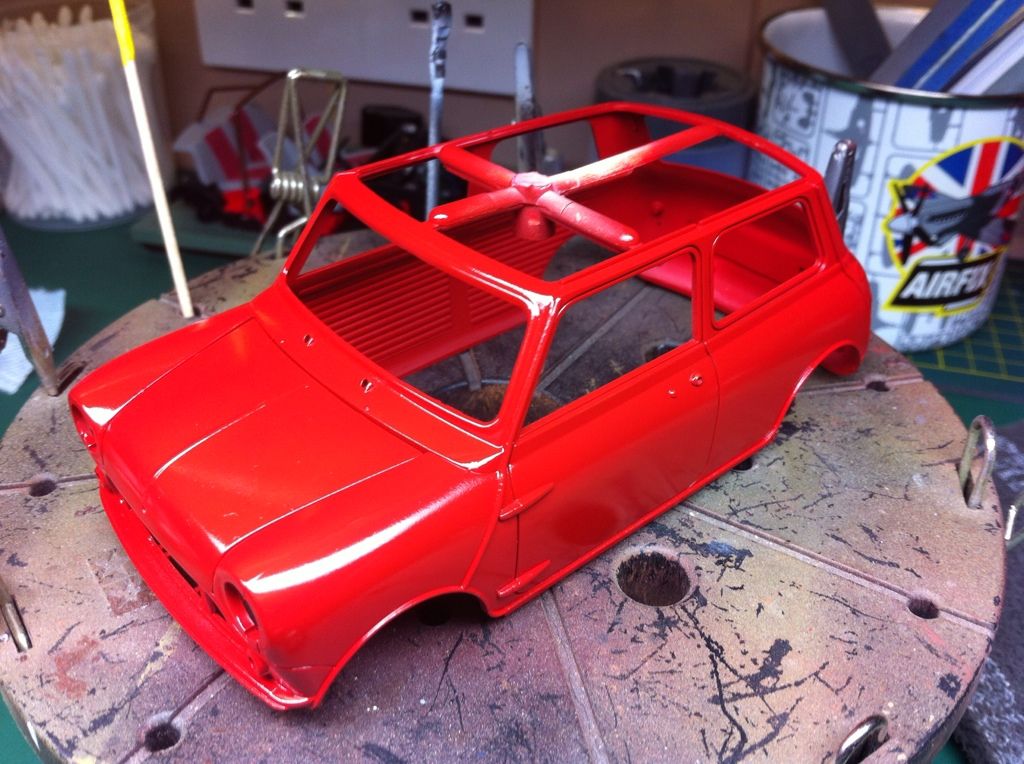
The degreaser, polishing pad and tack cloth are the same as used on full sized cars, I just cut of small sections of the tack cloth. You can see how much the degreaser removes after sanding, and that's after a wipe over beforehand. 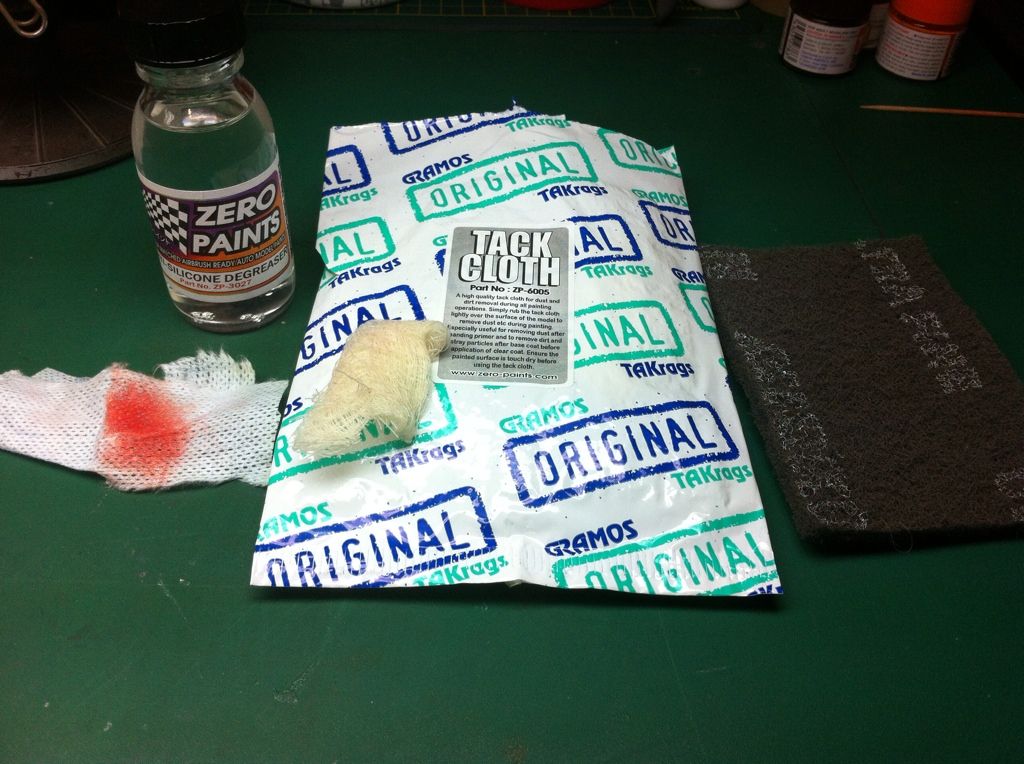
Some more progress
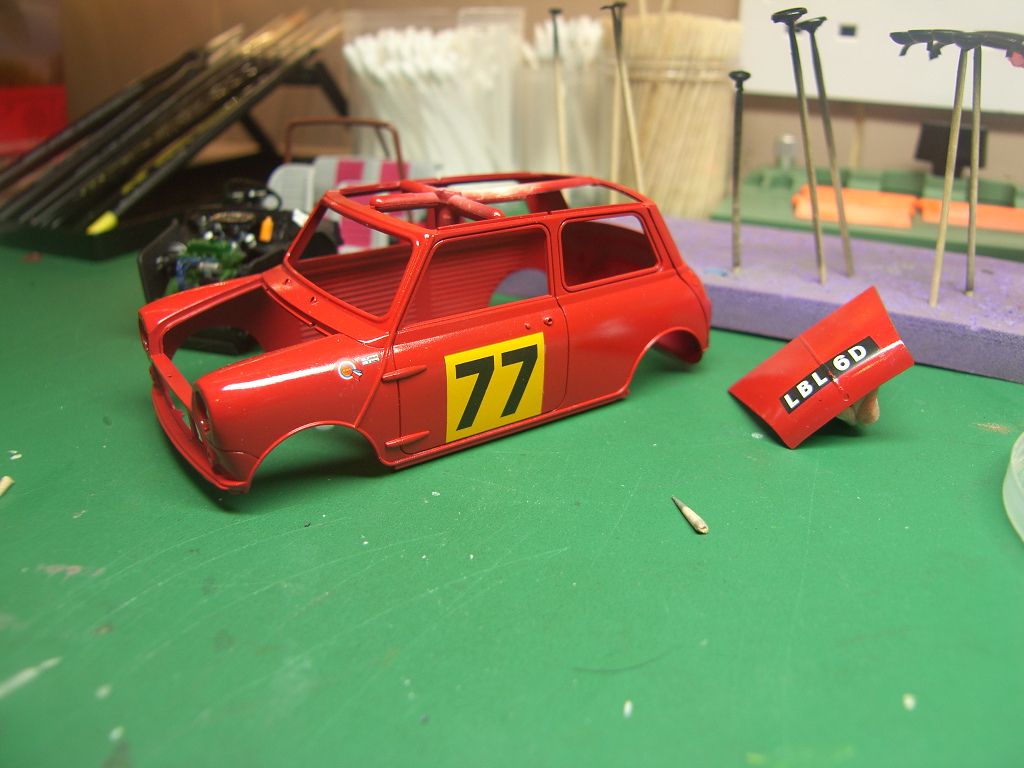
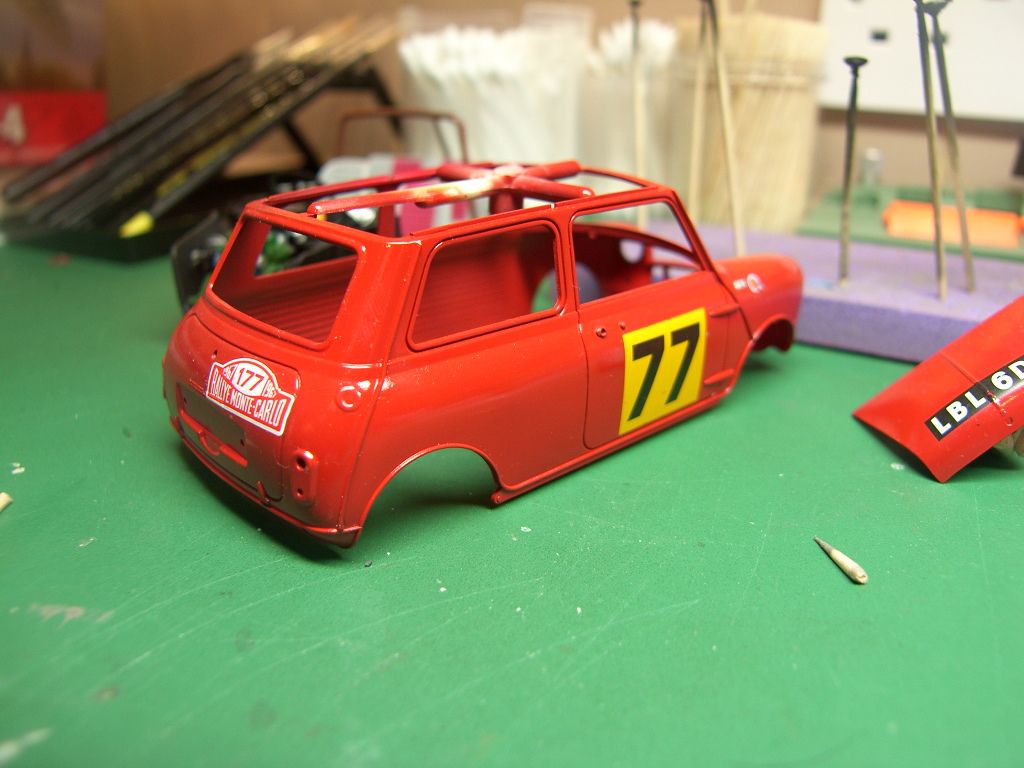
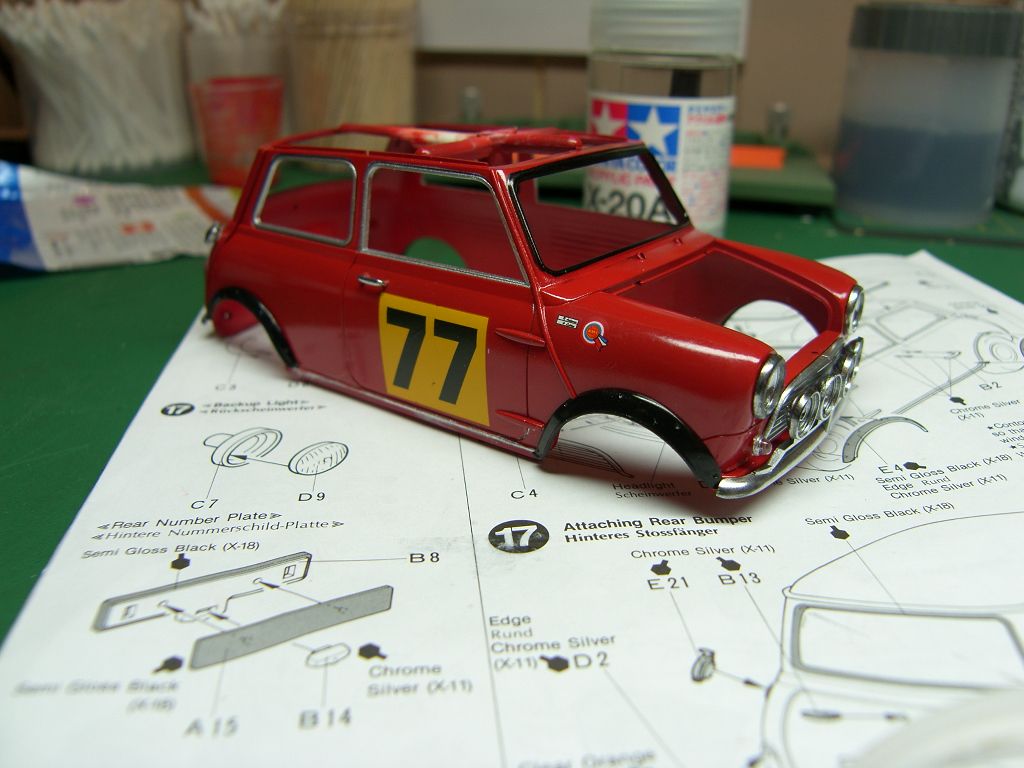
Bit more progress on this Got the body decals on (not many of them) the original number was 177 but I've gone with 77 as its my birth year. The decals were awful, falling to bits as they went on 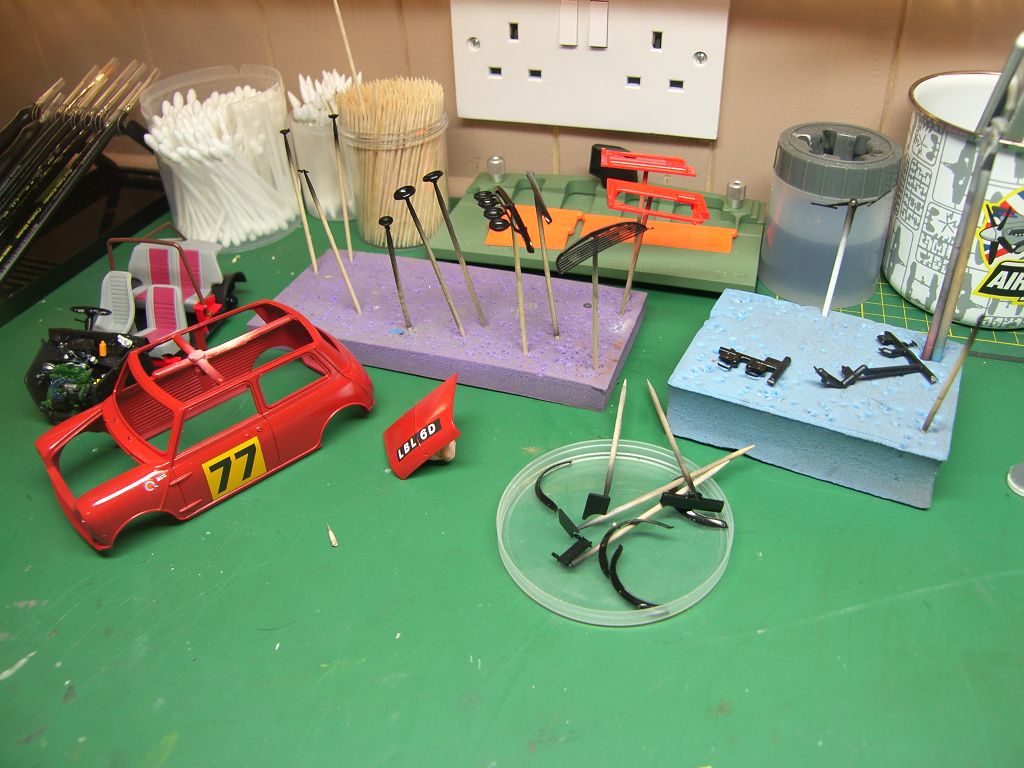
 I striped of the prechromed parts using oven cleaner and then primed them in alclad gloss black base
 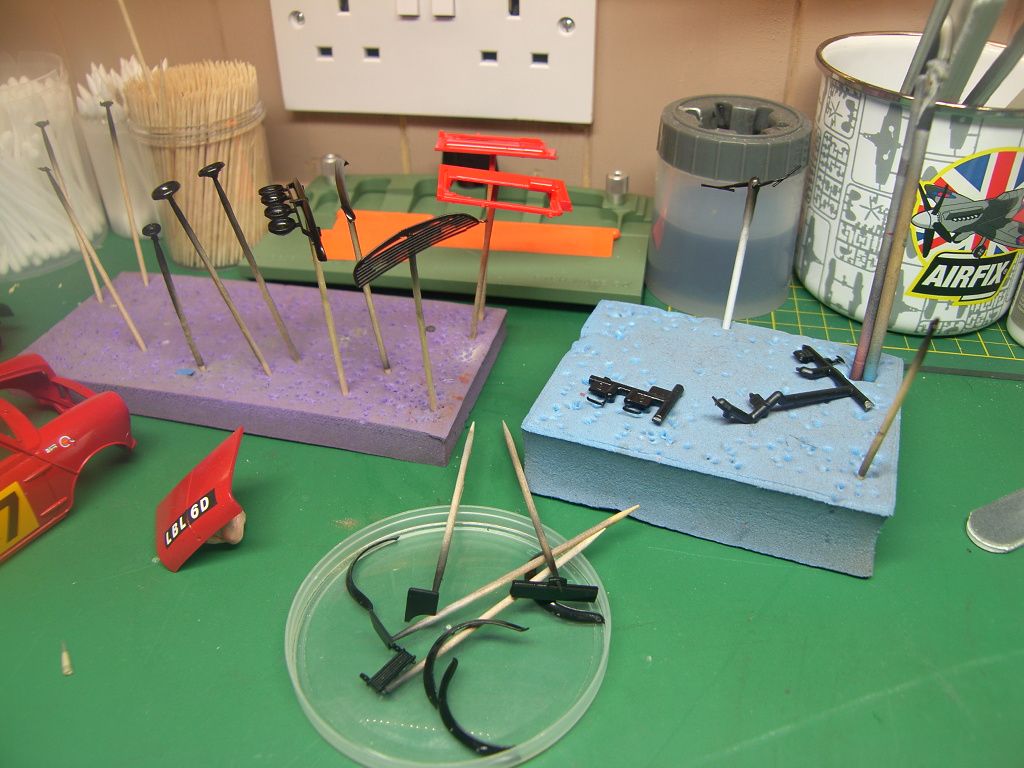 These were then sprayed in alclad chrome
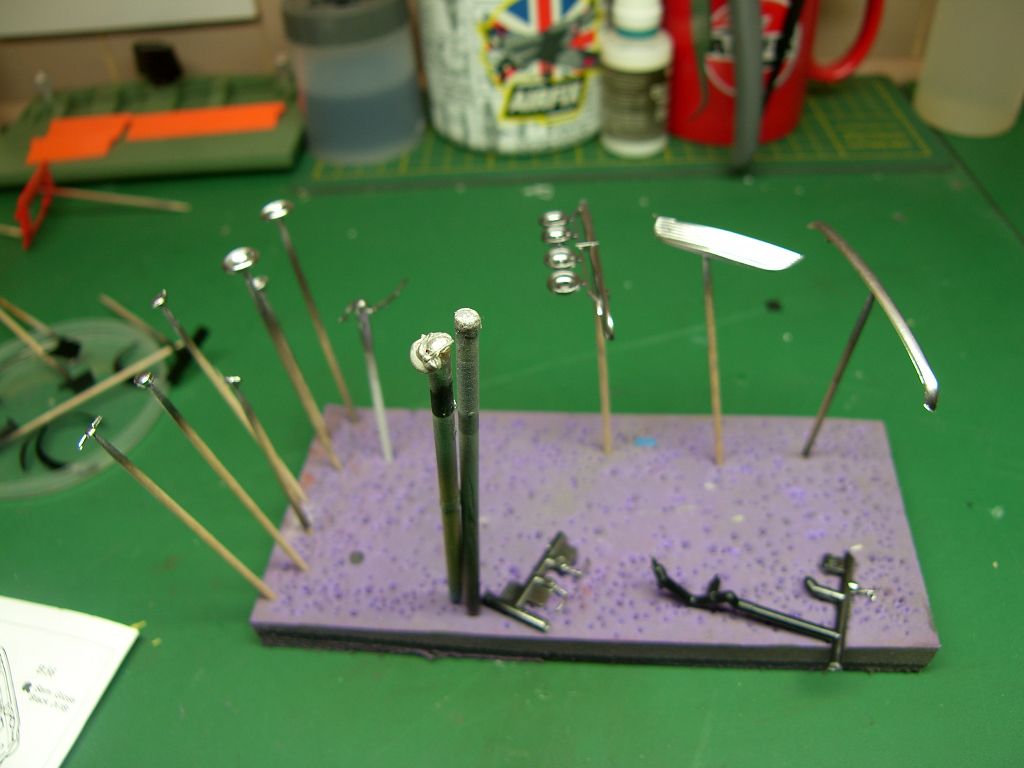
Need to get moving with this. Needs to be done for Sunday.
i plan to gloss this using zero 2 pak, havent used it before so fingers crossed. If it works well it'll stay shiny, if not its getting weathered.
Right got the window panels masked of and sprayed tamiya x11' and the front and rear windscreen with x18. Trickery bugger to mask that's for sure.
All the alclad chromed trim on and using a chrome tamiya detail paint pen, did the trim around the wheel arches and sills.
Another quality well focused shot
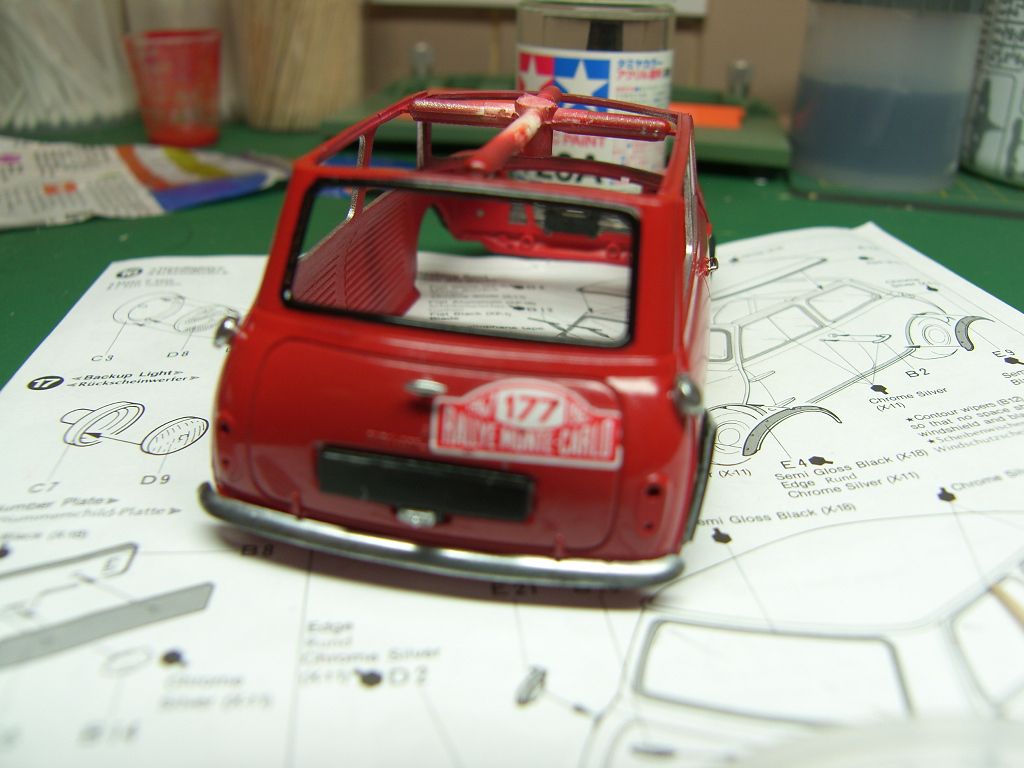
Also gave the interior and engine a thinned xf1 wash, thshroom in the background has been sprayed tamiya white and the wheels are ready for proteome in alclad gloss black. 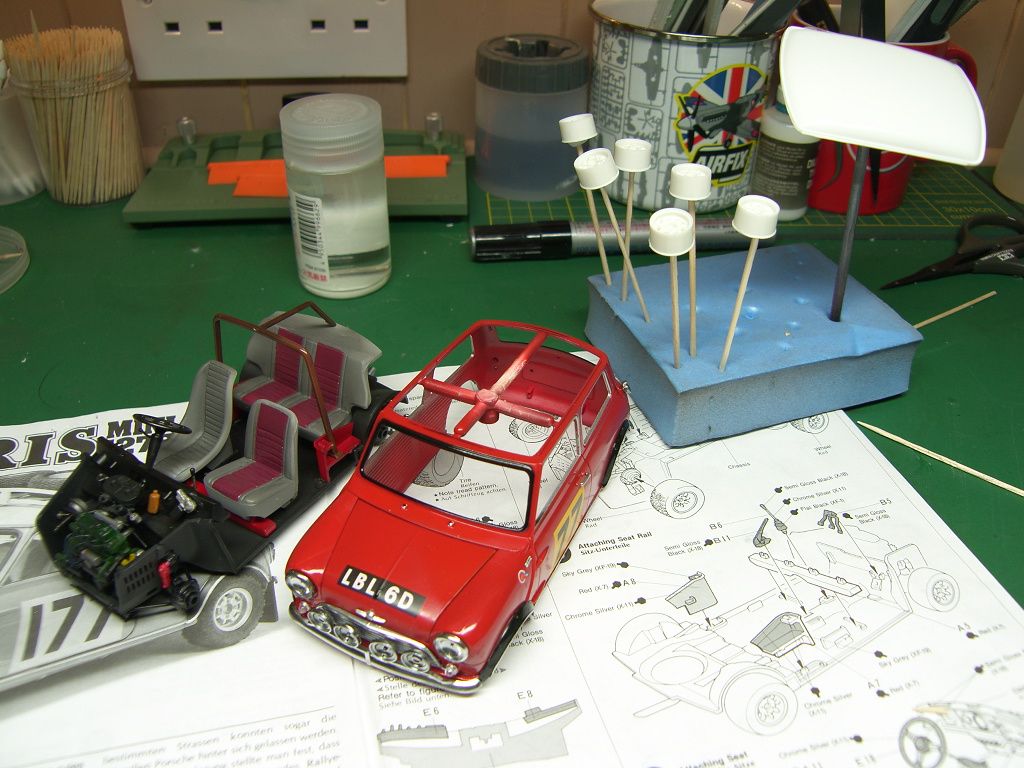

| Well I've just given this a good coat of zero paints 2 pak, which says it needs 48 hours to cure, i hope its dried enough to handle tomorrow as I need to put the glass in and then get it on the body. just about the spray the wheels and roof rack and its just about done, as long as the clear coat dries. It's under cover at the moment to protect it from airborne particles. its dust free after 30 mins so I got a quick couple of pics. 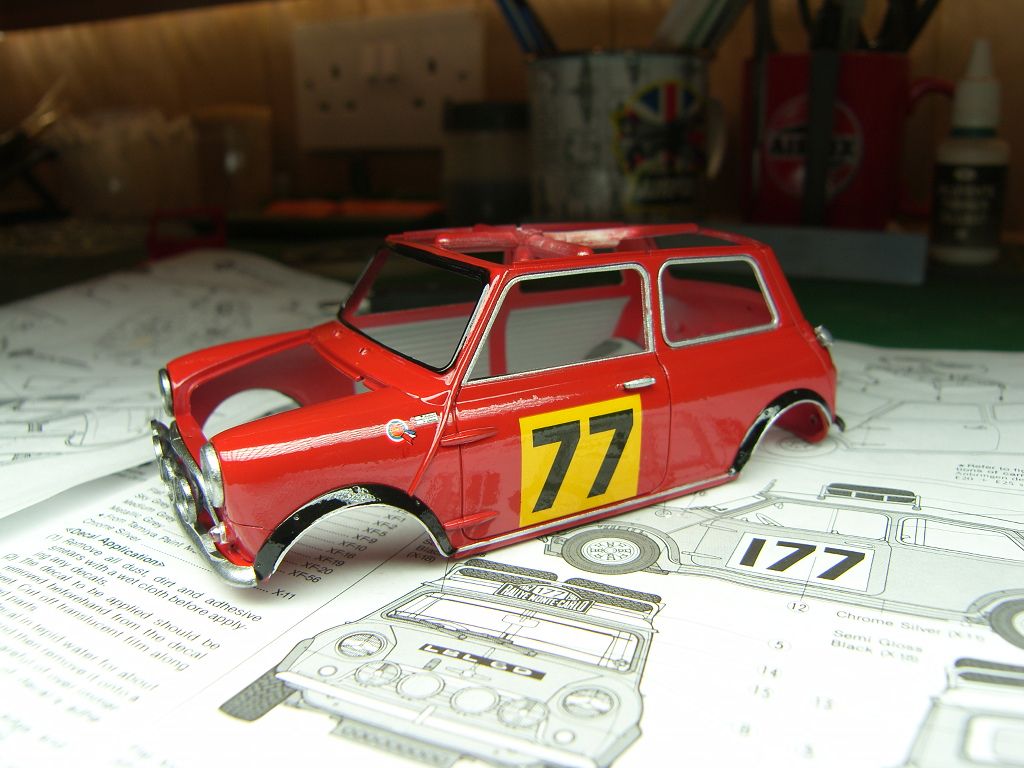 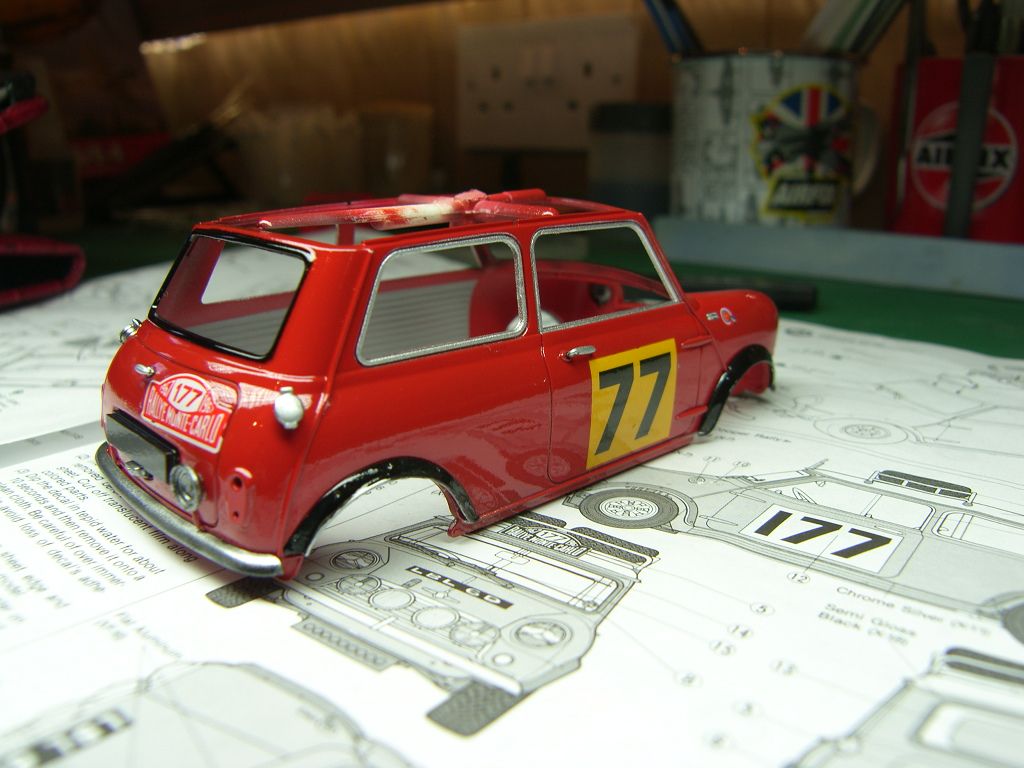 | |
| Ok got it finished, not my best work at all, rather disappointed in myself. These cars are certainly not easy to work on as every thing has to be perfect. The kit was good although the decals fell to bits, I'm had dramas fitting the windows which has left them looking not as clean as they should off, two lessons learnt in this build, ca activator marks clear Windows's as it has to the windscreen, and when shaking a tin of alcad black primer, make sure the lid is fully on The 2 pak clearcoat came out well until a drop of superglue fell he the body rear panel marking it. Any way here it is. 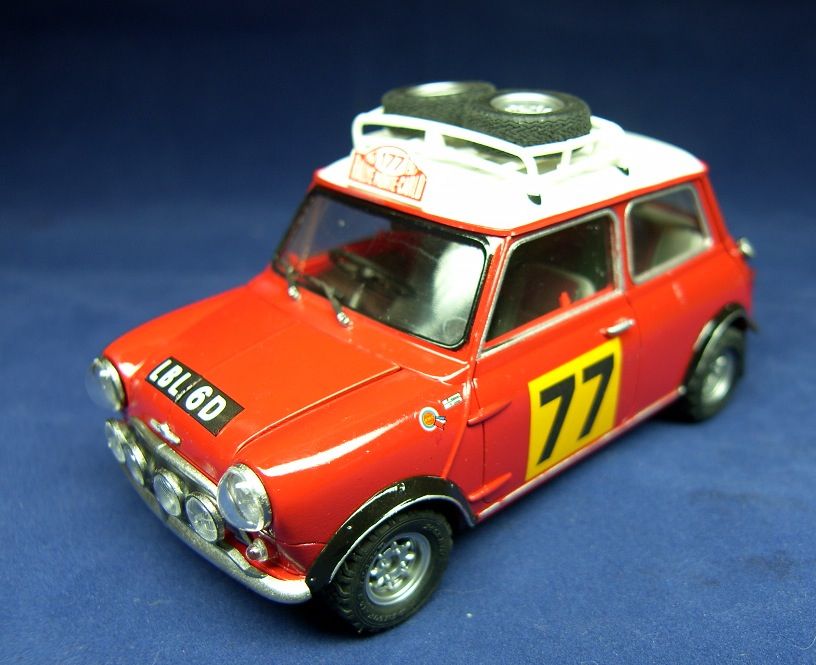 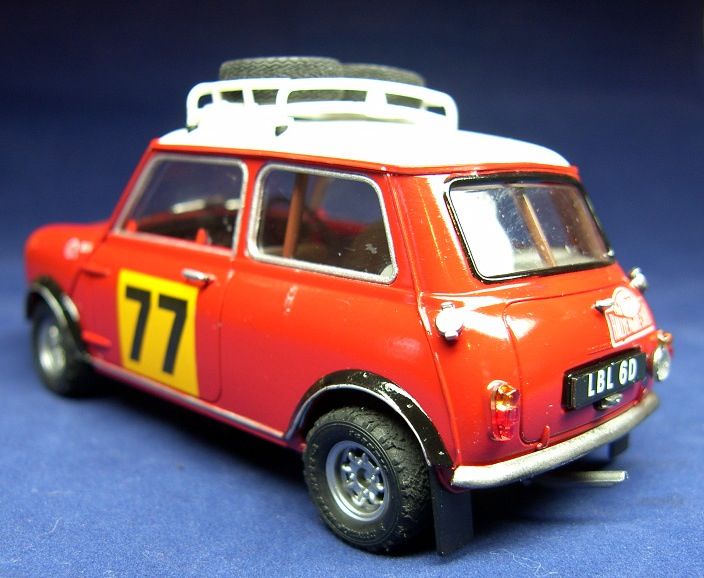 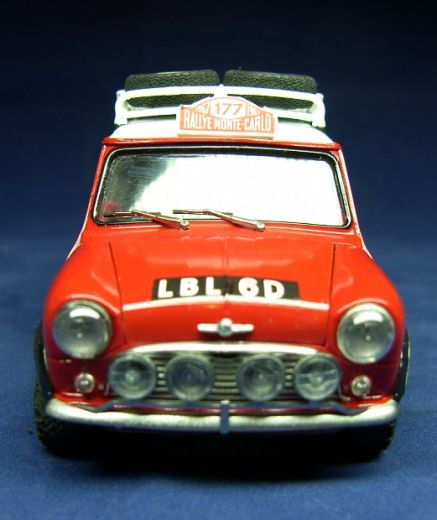 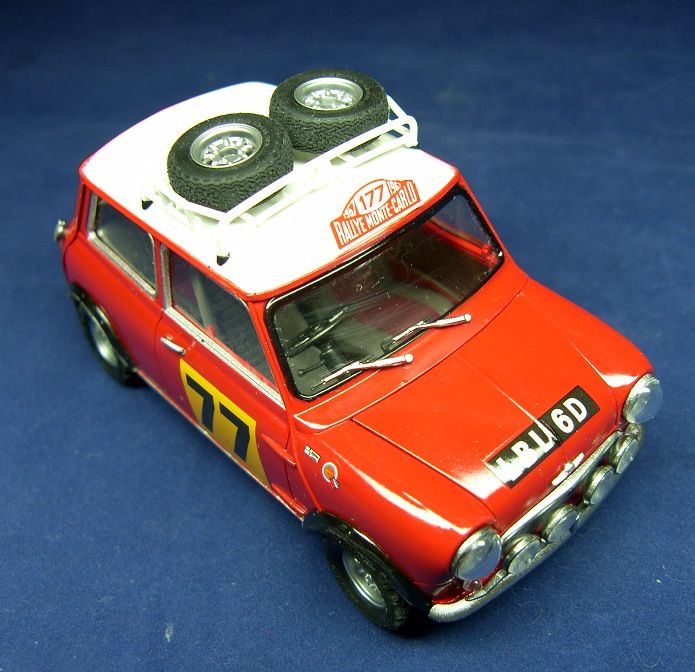 The bonnet wont stay open of its own accord so a cocktail stick was used. 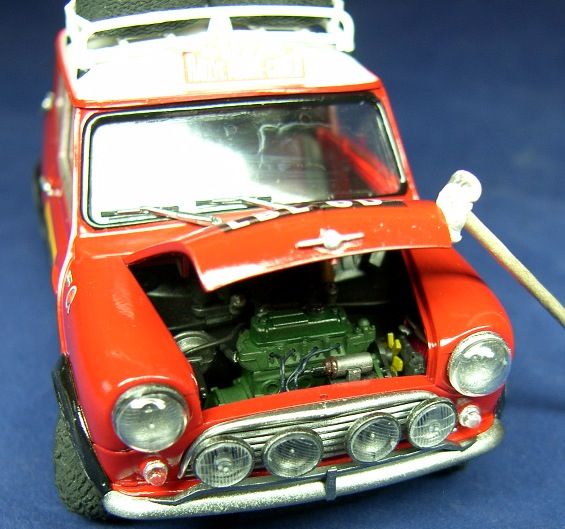 |
A first class job my friend, It's great to see someone build one of these quality Tamiya models, good pics as well showing the build. I'm the same, I have a similar one as well and hope to get around building It, now seeing your great looking model. My one Is a rally version as well : https://www.flickr.com/photos/28773898@N04/36767239761/in/photolist-Y1ZHqV-XYg8p5-XYg7Gy-WZVkxF-WXBLeJ-WKBSeR-WKBNAZ-XUYhyd-XUYfx9-XUYddu-XUYauJ-WKBsnc-XZ86oz-XZ842F-WHpkvJ-WHpipQ-WHpgUA-WHpeWN-WHpdmd-XUXUmY-XLNAmF-XLNy68-XZ7JW2-WKB2pr-XJ7DGG-XLNeZ8-XZ7w6c-XZ7txX-XUXtL5-WKArND-WKApkn-XZ7ngD-XZ7iNr-WHoB99-WHozuC-Xo74PE-Xo72qG-XUX6yE-XJ77ML-XJ75cf-XZ71aR-XZ6Xvc-TWrLWs-SHz8KS-TL71CG-TWru9u-TWrpUs-TWrnCy-TWrx6G-Tq1HCN I had a good few of the Tamiya Minis, even the lovely blue one they had In the 1/24 scale. I really like your model room, Well done again Paul, many thanks for sharing your great work. Kelvin. :)
ReplyDelete